
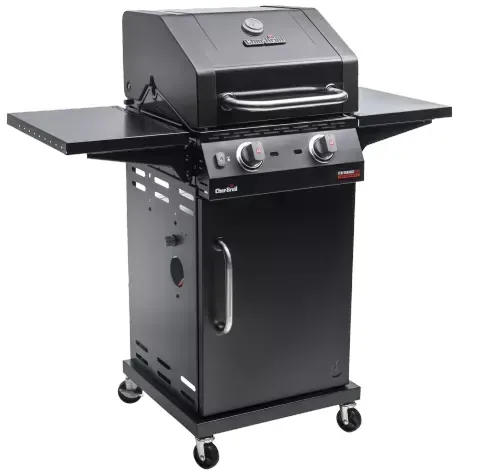
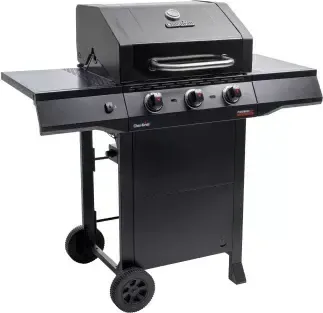
Char-Broil Performance Core Navod
PDF manuál · 152 stránok
Slovenčina



Rýchla kontrola
Nesprávna odpoveľa, skuste to znova.
Chatujte so svojím návodom Char-Broil Performance Core pomocou AI
Získajte okamžité AI odpovede z vášho Char-Broil Performance Core manuálu
Opýtajte sa čokoľvek o Char-Broil Performance Core. Odpovede vychádzajú z tejto príručky s uvedením zdrojových stránok.
Performance Core Harmonogram údržby
Vykonajte skúšku tesnosti pomocou mydlového roztoku aspoň raz ročne, a vždy, keď sa zmení alebo odpojí plynová fľaša.
Po každom použití vyberte a vyprázdnite nádobku na tuk. Nevyberajte ju, kým zariadenie úplne nevychladne.
Pred každým použitím skontrolujte hadice na rezy, opotrebovanie alebo zalomenia. Poškodené hadice okamžite vymeňte.
Pravidelne vizuálne kontrolujte plamene horákov, aby ste zaistili, že správne horia a nie sú upchaté.
Očistite veko, spodok, plastové, porcelánové a lakované povrchy vhodnými čistiacimi prostriedkami, aby sa zabránilo požiarom tuku a korózii.
Ak je gril dlhší čas nepoužívaný alebo ak je plameň slabý, vyberte a očistite horáky a venturiho trúbky, aby sa zabránilo upchatiu pavučinami.
Bezplatné pripomienky údržby
Načasované podľa dátumu nákupu. Vždy zdarma, z odberu sa môžete kedykoľvek odhlásiť.
Položte otázku
Odporúčate Performance Core?
Áno NieČasto kladené Otázky
It is designed for approved butane, propane, or gas mixtures, depending on the regional model specification. Use a compatible cylinder, regulator, and approved hose for your country. Confirm the gas pressure and regulator requirements before connecting the grill.
Je táto odpoveď užitočná?
Open the lid, ensure all burner controls are off, then turn on the cylinder gas supply. Push and turn a burner control to HIGH and press the electronic igniter. If it does not light within five seconds, turn controls off, wait five minutes, and try again.
Je táto odpoveď užitočná?
The CLEAN setting uses high burner heat to burn remaining food debris into ash. After grilling, run the main burners on CLEAN for around 12 to 15 minutes, switch them off, let the grill cool, then brush away the ash and remaining residue.
Je táto odpoveď užitočná?
Perform a leak test before first use, at least once a year, and every time the gas cylinder is changed or disconnected. Apply a soap-and-water solution to connections. Growing bubbles indicate a leak that must be corrected before use.
Je táto odpoveď užitočná?
Weak flames or difficult ignition can result from blocked burner ports or venturi tubes. Insects, spider webs, grease, and debris can restrict gas flow. Turn off the gas, clean the burner assembly, inspect for damage, and complete a leak test before cooking again.
Je táto odpoveď užitočná?
No. This gas grill is for outdoor use only in a well-ventilated location. Never operate it indoors, in a garage, carport, porch, covered patio, or under an overhead structure. Keep proper clearance from walls and combustible materials.
Je táto odpoveď užitočná?
Výhody a Nevýhody
Výhody

- Two independently controlled burners support flexible direct and indirect cooking zones.
- Electronic ignition offers convenient lighting, with match-lighting available as a backup.
- CLEAN setting turns food residue into ash in about 12 to 15 minutes.
- Compact two-burner format is well suited to patios, balconies, and smaller outdoor spaces.
- Clear maintenance guidance helps support reliable flames and safer long-term use.
Nevýhody

- Outdoor use only; the grill must not be used in garages, covered patios, or enclosed spaces.
- Regular cleaning is necessary to reduce grease-fire risk and prevent burner blockages.
- Gas cylinder, regulator, and hose compatibility varies by country and must be checked carefully.
- The grill requires clearance from walls, flammable materials, and ignition sources.
- Users must wait for the grill to cool before removing grease or completing most cleaning tasks.
Produkt Špecifikácia
Typ
Grilovací vozík
Popis Produktu
Návod na použitie Char-Broil Performance Core: Praktické plynové grilovanie s 3 horákmi
Char-Broil Performance Core je plynový gril s tromi horákmi navrhnutý na jednoduché vonkajšie varenie, od večerí počas pracovných dní až po pohodové víkendové grilovanie. V závislosti od regionálneho modelu je určený na použitie s butánom, propánom alebo schválenými zmesami plynov a poskytuje celkový menovitý tepelný príkon 7,91 kW. Tri hlavné horáky umožňujú flexibilné ovládanie teploty pri grilovaní mäsa, zeleniny, morských plodov a ďalších jedál pri zachovaní jednoduchej a známej obsluhy.
Návod na použitie Char-Broil Performance Core zdôrazňuje postupy, ktoré pomáhajú tomuto grilu poskytovať spoľahlivé výsledky: správne umiestnenie plynovej fľaše, kompatibilný regulátor a hadicu, pravidelné kontroly netesností a dôkladnú kontrolu horákov. Pred zapálením musí byť veko otvorené a gril musí byť umiestnený vonku v dobre vetranom priestore. Elektronické zapaľovanie má uľahčiť spustenie: otočte zvolený horák do polohy HIGH a podržte tlačidlo zapaľovača, kým sa horák nezapáli. Ak sa nezapáli do piatich sekúnd, vypnite ovládacie prvky, počkajte päť minút a skúste to znova.
Navrhnutý na bezpečnejšie vonkajšie varenie
Tento gril Performance Core je určený výhradne na vonkajšie použitie. Musí byť umiestnený aspoň 1 m od stien alebo povrchov a 3 m od horľavých predmetov či zdrojov zapálenia. Jeho vetracie otvory, Venturiho trubice horákov a rošty na varenie musia zostať voľné. Drevené uhlie, keramické brikety a alobal zakrývajúci rošty nie sú pre tento plynový gril vhodné, pretože môžu narušiť správne vetranie horákov.
Rovnako dôležitá je dobre udržiavaná nádoba na tuk a čistý vnútorný priestor grilu. Mastnota a zvyšky jedla sa môžu časom nahromadiť, čím sa zvyšuje riziko vzplanutia alebo požiaru mastnoty. Gril obsahuje nastavenie CLEAN, ktoré využíva vysokú teplotu horákov na premenu zvyšných nečistôt na popol po varení. Hlavné horáky nechajte bežať na nastavení CLEAN približne 12 až 15 minút, potom ich vypnite, nechajte gril vychladnúť a popol odstráňte kefou.
Čistenie a priebežná starostlivosť
Pravidelná starostlivosť pomáha zachovať výkon aj bezpečnosť. Po každom použití rošty po vychladnutí vyčistite, vyprázdnite nádobu na tuk a pravidelne kontrolujte plamene horákov. Ak je zapaľovanie ťažké alebo sa plamene zdajú slabé, vyčistite trubice horákov a Venturiho trubice. Drobné druhy hmyzu a pavučiny môžu blokovať prietok plynu a spôsobovať spätné šľahnutie plameňa, najmä po dlhom skladovaní.
Pri sezónnom skladovaní udržiavajte gril v suchu a zakrytý vonku. Ak ho skladujete v interiéri, najprv vypnite a odpojte plynovú fľašu a potom ju skladujte vonku na vetranom mieste. Pred opätovným použitím grilu skontrolujte, či nie sú horáky upchaté, a vykonajte skúšku tesnosti.
Poznámka: Vždy používajte schválený regulátor a hadicu kompatibilné s typom plynu a požiadavkami krajiny. Pri požiari mastnoty nikdy nepoužívajte vodu, namiesto toho vypnite ovládacie prvky horákov a prívod plynu.
Vyhľadať: 67 706 Manuály online


Zadajte značku alebo model